I’m fixing a hole where the rain gets in
And stops my mind from wandering
Where it will go
—Lennon/McCartney
Removing the wheel. Your wheels are likely attached to the frame with either quick release levers or thru-axles. To remove your wheel you will have to know how to use either. If you have an inexpensive bike (or a fixed gear/singlespeed), your wheels might be retained by regular screw-on nuts; if so, you’ll need a wrench to remove the wheel. Do you carry one with you? If not you’ll have to get a lift home or to a bike shop.

Quick Release Levers. Quick release levers are the more common wheel retention system but they are slowly being replaced by thru-axles. Quick releases do not require using any tools: you just flip the lever open to rotate a cam and then remove the wheel from the dropouts. Conversely you put the wheel back in the dropouts and flip the lever closed. It’s actually not quite that simple. Almost all bikes made in the last 40 years have so-called “lawyer tabs” on the front dropouts only. These little nubs prevent you from removing the wheel even after you open the quick release lever. After flipping the lever open, you have to unscrew the quick release nut on the end of the skewer until you can get both ends of the axle over the nubs at which point you can remove the wheel. Conversely after you insert the wheel back in the front dropouts, you have to screw in the quick release nut a bit before the quick release lever will tighten onto the dropouts. They’re called “lawyer tabs” because some people who didn’t know how to use quick release levers correctly had their front wheel come off and they crashed, of course resulting in a lawsuit. Rear dropouts do not have “lawyer tabs”. Before you try to replace your tube, be sure you know how to properly use quick release levers so you can loosen and tighten them correctly. You close a quick release lever by flipping it 180 degrees to tighten the cam onto the dropouts. The lever is not a wingnut, i.e. you do not tighten it on the dropouts by screwing it on. By the way, the quick release lever should be flipped fully so that it doesn’t stick out from the bike. If you can’t flip it about 180 degrees, then you need to loosen the end nut a bit until you can while still gripping the dropout tightly. And how tight should you tighten the lever? The traditional advice is that the pressure you use with the palm of your hand should leave an impression. It should be firm but not so firm that you cannot open the lever. Needless to say you do not want to have your quick release accidently open because it was not tightened sufficiently!
You do not need to fully unscrew the end nut to remove the wheel, just enough so the wheel drops out when the lever is fully open. By the way, if for some reason you’ve unscrewed the end cap completely and you have to reinsert the skewer through the axle, the lever should be on the left side of the wheel. (There is an exception: some front wheels with disc brakes and quick releases are designed so the quick release is supposed to be on the right side. But this is rare.) For the rear wheel this is important because putting the quick release lever on the right side potentially has it interfere with the rear derailleur; for the front wheel it usually doesn’t matter mechanically which side you put the lever is on. (But it looks strange to have the lever on the right side!) Quick release skewers also have two metal springs on them; make sure one is on each side on skewer (i.e. don’t put both springs on one side!)
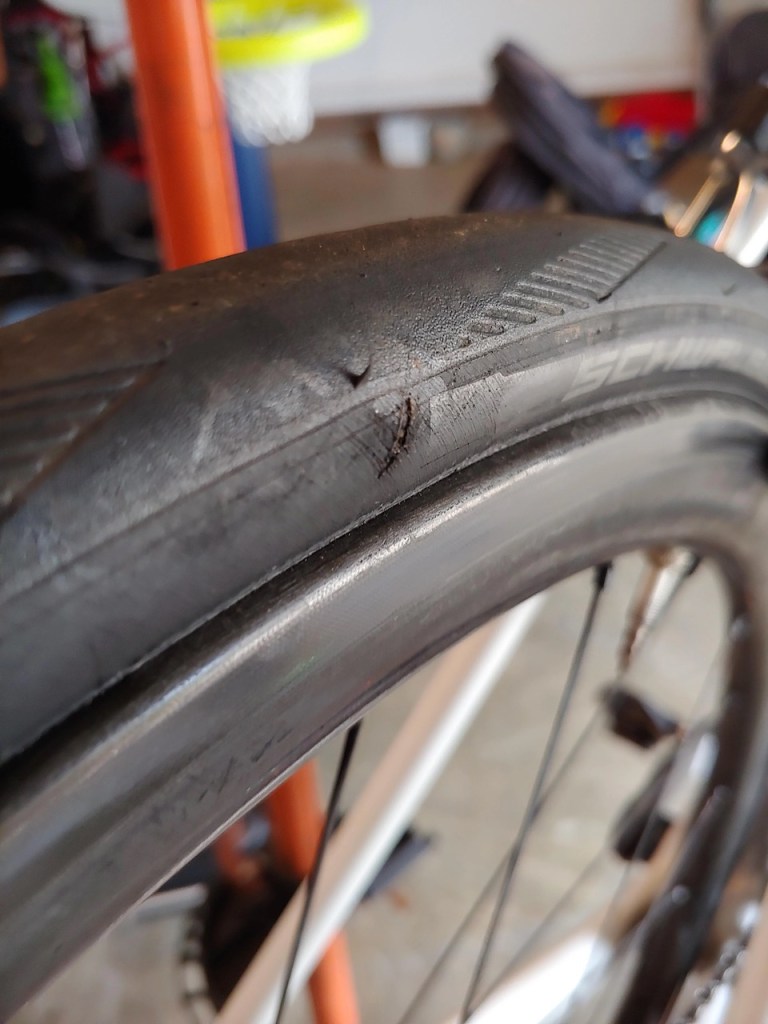
Thru-axles. Thru-axles are a bit easier in concept but they usually require you have the proper tool—almost always an Allen wrench—to use them. (Some thru-axles as in the picture above have a proprietary lever for unscrewing them; others may require a Torx wrench.) A thru-axle is simply a big screw that holds your wheel in place. To remove the wheel you unscrew the axle and pull it out. The wheel just drops out. To replace the wheel you put the wheel in the dropouts and insert the axle, then screw it in tightly. This is where carrying a mini tool or the correct size Allen or Torx wrench is important. Without a tool you cannot remove the wheel. Currently thru-axles don’t have the equivalent of “lawyer tabs”. Even if the thru-axle isn’t screwed in tight, the wheel can’t come off without the axle completely unscrewing on its own and then falling out, a rather unlikely event. But you can see where this is going: someone is going to improperly screw in a front thru-axle and when it falls out and results in an injury or death, thru-axles in the future will end up having some kind of backup retention mechanism.

Front wheel or rear wheel? To remove a front wheel with rim brakes, first open the cable release on the rim brake. This lever opens the gap between the brake pads even more so that it is easier to remove a wheel. Some rim brakes do not have a little lever on the brake to open the brake. Instead there is a button on the brake lever you push to create more slack and widen the caliper arms. Most tires are wider than the rim and you’ll need to open that lever (or push the button) to get the wheel out. Of course if your tire is already completely deflated, it may not matter much. For some really tight tire-brake combinations in order to get the wheel inserted and positioned correctly you may have to deflate the tire and then inflate the tire. But that is an uncommon situation. If you’ve got center pull, cantilever, or V-brakes, the cable is released differently than for rim brakes and you’ll have to know how for your specific brakes. Of course this is irrelevant if your bike has disc brakes.

Removing the rear wheel is slightly more complicated than a front wheel. The chain wraps around the cassette and the rear derailleur pulleys; both will have to out of the way to get the wheel to drop out of the dropouts. Back in the day it didn’t matter what gear you were in because when it came time to reinsert the rear wheel it was obvious which cassette cog it needed to go around. But now that we have up to 13 cogs it’s harder to eyeball where it should go. You can make note of it when you remove the wheel or if you’ve got electronic shifting and it’s connected to your bike computer, you can look at the gear it is in as shown on your computer. I’ve found it easier just to shift the rear derailleur so it’s in the highest gear (= smallest cog); when you insert the wheel, it is easy to line it up over the smallest cog. So either shift into the smallest cog or make note of which cog you’re in.
If your bike has rim brakes, open the little brake release first just as you would for a front wheel. To remove the wheel after you’ve loosened the quick release or removed the thru-axle, lift the rear of the bike and gently pull back on the rear derailleur body so that the chain and the cassette are free of each other. The wheel should drop out easily.
Lay the bike down carefully. Be sure to position your bicycle now minus a wheel so that it is ‘safe’. By ‘safe’ I mean either upright—leaned against something or being held by somebody—or by laying it on the ground on its left side. Do not lay the bike on its right side. Why? Because that’s the side with the derailleurs. Laying it on its right side risks damaging the rear derailleur or bending the rear dropout or both. If you have removed the rear wheel, do not sit the bike upright and try to balance the rear of the bike on the rear derailleur! There’s no harm in balancing the bike by the fork dropouts if you’re working on a front wheel.

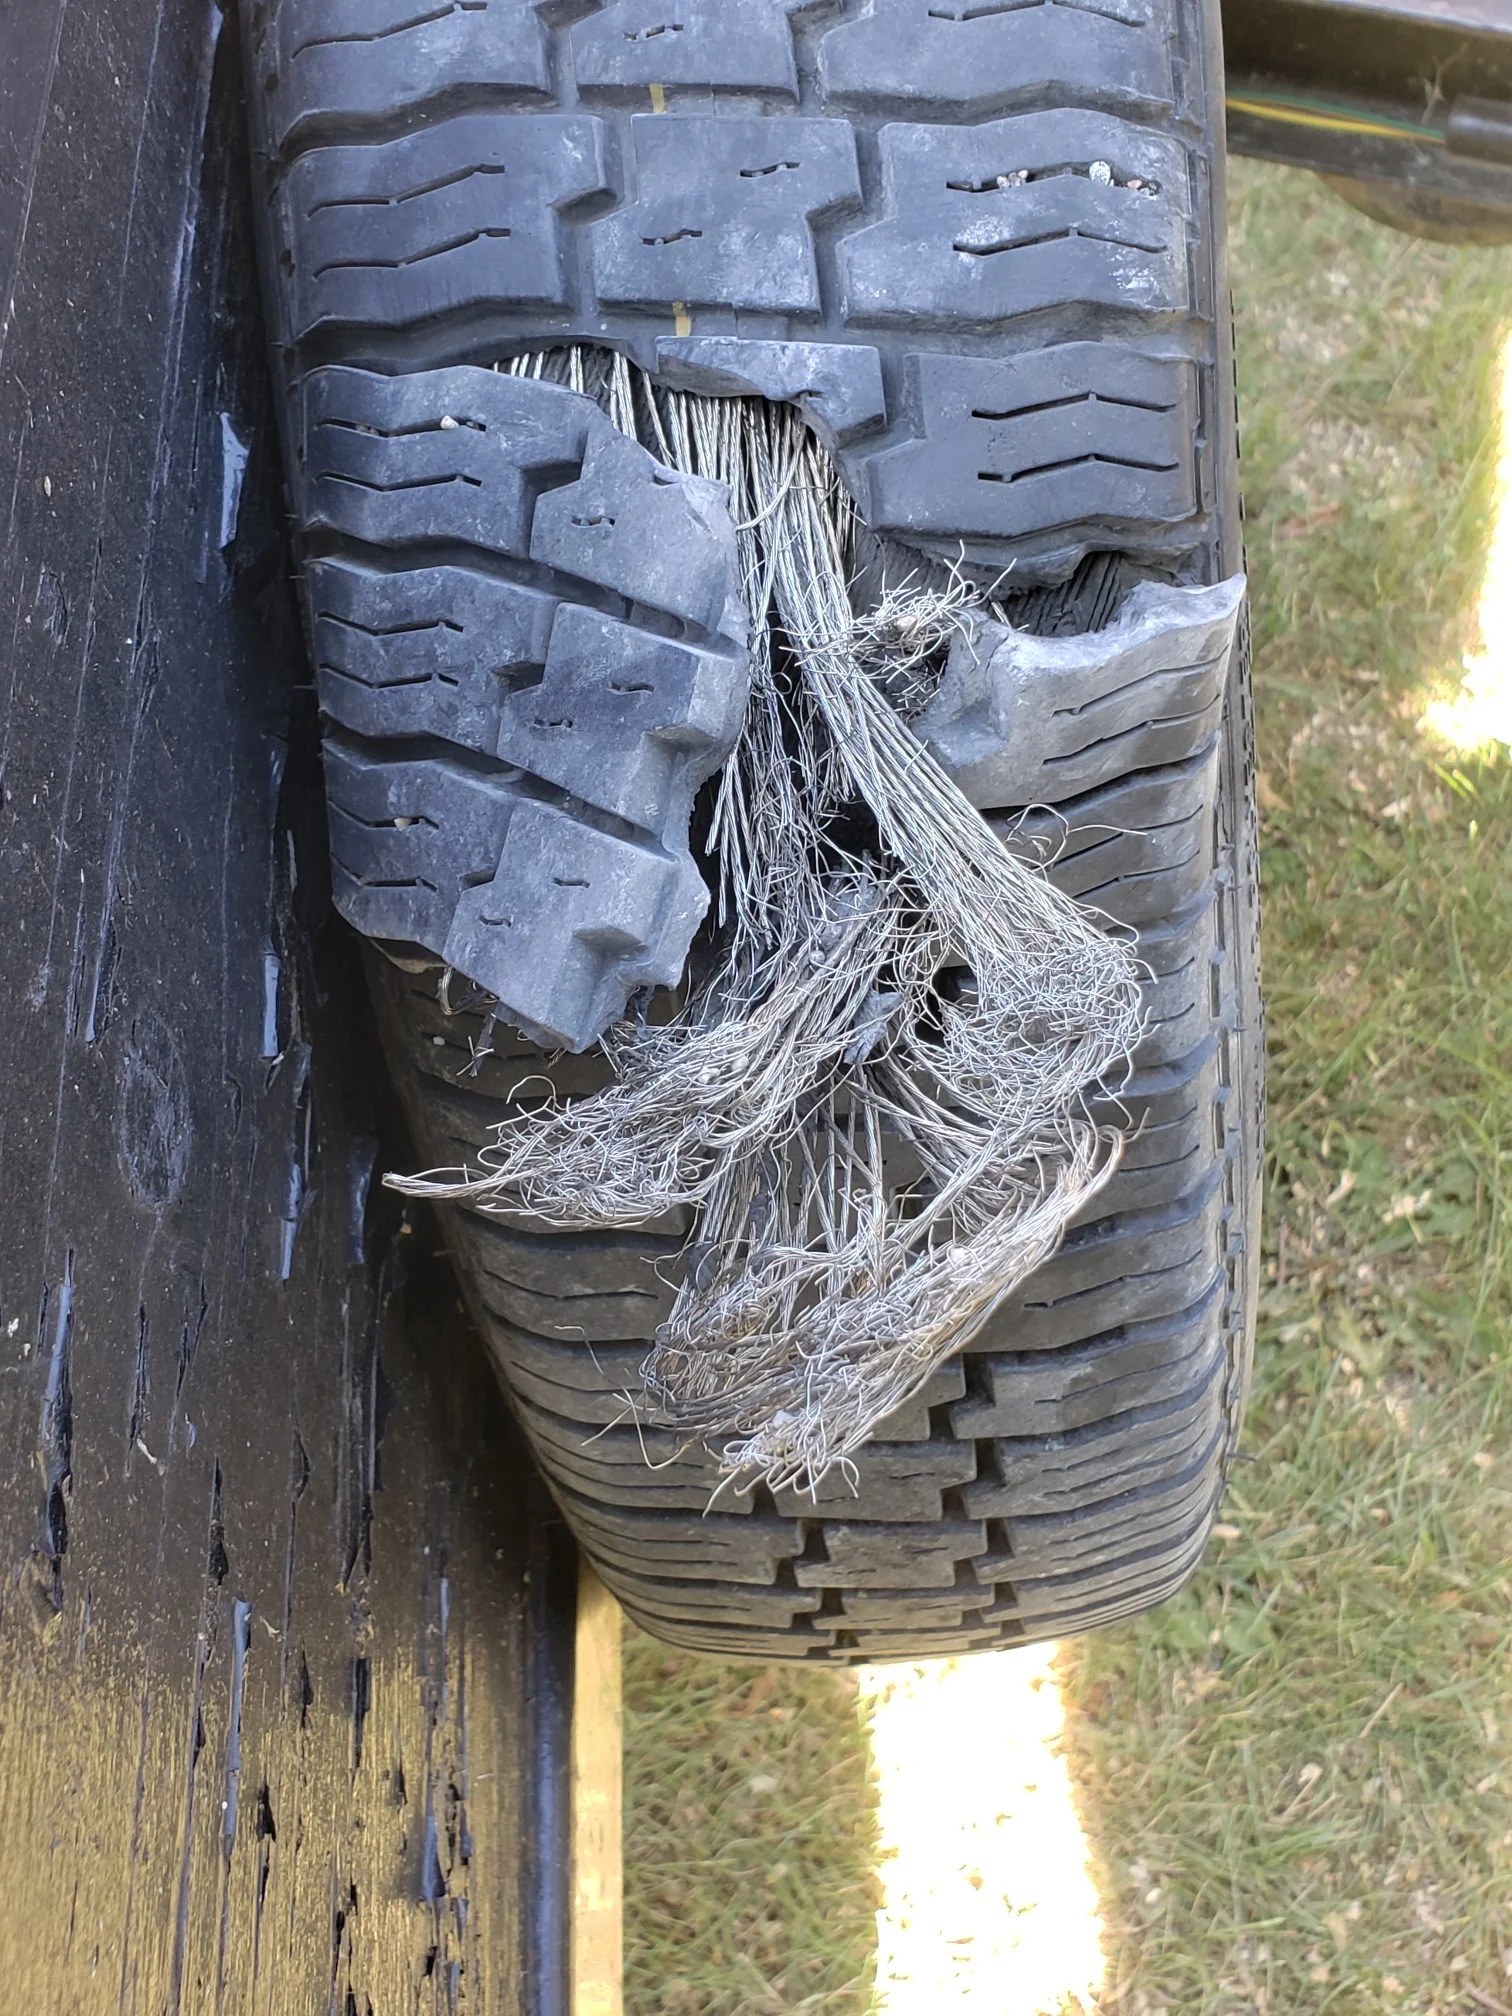
Looking for the leak on the tire. With the wheel off the bike it is now easier to inspect the entire tire. Inspect not just the center of the tread but also along the sides. It helps to palpate the tire as well as inspecting it visually. Run your hand to feel for something small stuck in the rubber. If you find something, note its position and attempt to remove it. If it’s really small or barely protruding, you may not be able to remove it with your finger. If the tire is already completely deflated, sometimes pinching the suspected puncture site will allow you to remove the object. Most sharp objects will come out—either now or later—in one piece. But you need to be careful if it’s a thorn especially a blackberry thorn because it’s soft enough that you think you’ve removed it but the tip may still be stuck through the tire and into the tube. Always palpate the inside of the tire casing at the puncture site to make sure there is nothing left sticking in that might flat your spare tube. The small blade of a Swiss Army knife may help you remove a recalcitrant sharp object; also some knives include a pair of tweezers. These are very helpful for removing the small metal wires from car radial tire carcasses that cause punctures.
If your tire still has some air, you may either hear it hissing or feel the air escaping by holding the wheel by your face and slowly rotating it.
If you’re still having difficulty spotting the cause of the puncture, there are a few things you can try. First, wipe down the tire carefully and slowly. If something is stuck in your tire, you may feel it as you run your hand around the circumference. Second, with grit and dirt rubbed off, you may be able to spot the puncture more easily. There is another option sometimes: use water if your tire still has some air (or you can pump it up a bit). If you’ve got a puddle nearby and your tire is still partially inflated, you can slowly dip the tire in the puddle to see any escaping bubbles. Rotate the wheel slowly in the water until you see bubbles.I’ve used my water bottle occasionally to confirm where I think the puncture is: pour water on the site and see if there are any bubbles. If you think you’ve found the puncture and want confirmation, you can rub some saliva over the site as well.
If you find something embedded make note of the location—count the number of spokes the site is away from the valve hole (and note the orientation of your wheel). This is so you will know where to look on the inside of the tire casing to ensure you’ve fully removed the cause of the puncture and to precisely locate the hole in the tube.
If you fail to find the cause of the flat from the outside, then you should proceed to demounting the tire and inspecting the inside of the tire casing and the tube.

A sidenote on tubeless tires. If you have tubeless tires, you’ll probably see sealant escaping. There should be an obvious wet spot on the tire with sealant oozing or spewing out. You should spin the wheel so that the puncture is at the bottom of the wheel. This lets the sealant pool above the puncture site and hopefully it will coagulate and seal. This may take several minutes. Then pump up the tire slowly and see if it can hold air. If the puncture is small enough, it will seal but it may not be able to seal at your typical tire pressure. If you have a seal and then pump up the tire but the seal fails again, you can try letting it sit longer to seal. If it won’t, then you can try tire plugs. Hopefully you’ve practiced at home and know how to insert a tire plug and remove the tool. If one plug doesn’t stop the leak, you can inserting a second plug. If that doesn’t do it, then you’ll have to decide whether to ride home on a low tire or…install your spare tube. (You do carry a spare tube and pump even though you are running tubeless tires, right?) And then we’re back to the same situation as if you were running tubes (except you have sealant in your tire and it will make a mess).